Fencing Regulations Auckland 2025: Height & Council Rules | My Homes Fencing Expert
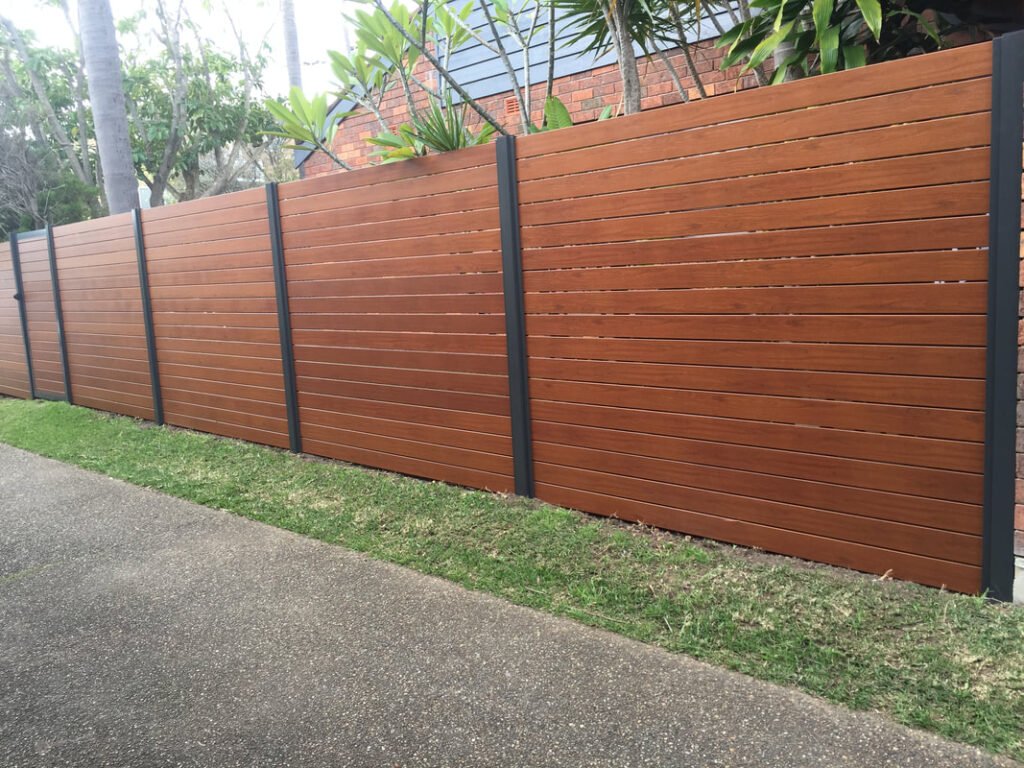
Fencing Regulations in Auckland: Height, Boundaries & Council Rules Introduction Building a fence in Auckland is a great way to boost privacy, security, and kerb appeal, but it comes with strict rules. Understanding fencing regulations Auckland is essential to avoid disputes, fines, or costly rebuilds. My Homes Fencing Expert brings you this 2025 guide to navigate fence height NZ law, boundary fencing rules Auckland, and Auckland Council fencing regulations. From shared boundaries to council consent for fences, we’ll ensure your fencing project complies with fencing laws 2025 and enhances your Auckland home. Why It’s Important to Understand Fencing Laws in Auckland Fences are more than just property markers—they define boundaries, ensure privacy, and add value. However, ignoring Auckland Council fencing guide or boundary fencing law can lead to legal headaches or unhappy neighbours. Here’s why compliance matters: Avoid Legal Issues: Breaching fence height limit NZ or building without council consent fencing can result in fines or orders to remove the fence. Maintain Neighbour Relationships: Clear communication about shared fence costs NZ prevents fencing boundary disputes and fosters goodwill. Protect Your Investment: A compliant fence ensures durability and boosts your home’s value, especially in Auckland’s competitive market. Safety and Aesthetics: Properly built fences meet safety standards (e.g., for pools) and align with local design trends. Local Example: A Takapuna homeowner faced a dispute after building a 2.5m fence without consent, forcing a costly rebuild to meet legal fence height NZ rules. Step-by-Step Overview of Auckland’s Fencing Regulations Follow these six steps to ensure your fencing project complies with fencing regulations Auckland and fencing act NZ 1978. 1. Maximum Fence Heights Before Consent Is Required Fence height NZ law sets clear limits to balance privacy, safety, and aesthetics: Boundary Fences: Up to 2m without council consent for fences in most residential zones. Front Yard Fences: Limited to 1.2–1.5m to maintain visibility and street appeal. Pool Fences: Must be 1.2m high with child-safe gates, per NZ building code. Heritage or Special Zones: Stricter limits (e.g., 1m) in areas like Parnell or Devonport. NZ Tip: Check the Auckland Unitary Plan for zone-specific fence height limit NZ rules or consult My Homes Fencing Expert. 2. Rules Around Fencing on Shared Property Boundaries Boundary fencing rules Auckland are governed by the Fencing Act NZ 1978: Shared Costs: Neighbours typically split shared fence costs NZ 50/50 for a “sufficient” fence (e.g., 1.8m timber). Agreement Required: Discuss design, materials, and costs before building to avoid shared fence disputes NZ. Notice: Provide written notice (at least 21 days) to your neighbour outlining the proposed fence and costs. Example: A Mt Eden homeowner split costs for a 1.8m timber fence after formal notice, avoiding fencing boundary disputes. 3. When Council Consent Is Necessary Council consent fencing is required for: Fences exceeding 2m (boundary) or 1.5m (front yard). Retaining walls over 1.5m or supporting extra weight. Fences in heritage zones, near roads, or affecting drainage. Pool fences not meeting NZ building code safety standards. Visit Auckland Council’s fencing page for detailed Auckland Council fencing regulations. 4. Cost-Sharing Rules Under the Fencing Act 1978 The Fencing Act NZ 1978 outlines: Both parties share costs for a standard fence unless otherwise agreed. A “sufficient” fence is functional, not decorative (e.g., basic timber, not ornate metal). If a neighbour refuses to contribute, you can build and seek reimbursement via the Disputes Tribunal. NZ Tip: Document all agreements in writing to avoid shared fence disputes NZ. 5. Locating Exact Property Boundaries Before Building Incorrect boundaries can lead to fencing boundary disputes. To confirm property line fencing rules: Check your property’s Certificate of Title or survey plan via Land Information New Zealand (LINZ). Hire a licensed surveyor for precision, especially on corner sections or sloping land. Mark boundaries clearly before construction begins. Example: A Remuera homeowner avoided a dispute by hiring a surveyor for their sloping section, ensuring accurate fence placement. 6. Process of Resolving Disputes with Neighbours If neighbour agreement fencing NZ fails: Negotiate: Discuss concerns calmly and propose compromises (e.g., lower height, shared costs). Mediation: Use a community mediator to find a solution. Disputes Tribunal: For unresolved shared fence disputes NZ, file a claim (costs under $30,000). Legal Advice: Consult a lawyer for complex cases involving property line fencing rules. NZ Tip: My Homes Fencing Expert can mediate discussions to ensure smooth neighbour agreement fencing NZ. Pro Tips & Mistakes to Avoid Building a compliant fence in Auckland requires careful planning. Here are expert tips from My Homes Fencing Expert: Mistake: Assuming the Boundary: Always verify property line fencing rules with a surveyor to avoid disputes. Mistake: Building Too High: Exceeding legal fence height NZ (2m for boundary fences) without council consent fencing risks fines or demolition. Mistake: Skipping Notification: Failing to notify neighbours can void shared fence costs NZ agreements. Tip: Legal Notification: Send a formal fencing notice (template available from Auckland Council) at least 21 days before building. Tip: Licensed Contractors: Hire a fencing contractor Auckland to ensure fencing compliance Auckland and quality construction. Tip: Design for Function and Appeal: Combine privacy (e.g., 1.8m timber) with aesthetics (e.g., lattice tops) to suit Auckland’s coastal vibe. Example: A Papatoetoe pool fence combined 1.2m metal panels with clear Perspex for safety and style, meeting Auckland Council fencing regulations. FAQs Before Conclusion How high can a fence be in Auckland without council consent? Boundary fences can be up to 2m, and front yard fences up to 1.2–1.5m, per fence height NZ law. Higher fences require council consent for fences. What if my neighbour doesn’t agree to pay for the fence? Under the Fencing Act NZ 1978, you can build a “sufficient” fence and seek reimbursement via the Disputes Tribunal if no neighbour agreement fencing NZ is reached. Do I need a surveyor to locate my boundary? Not always, but it’s recommended for accuracy, especially on corner sections or sloping land, to avoid fencing boundary disputes. Conclusion Navigating fencing regulations Auckland ensures your fence is legal, functional, and built to last. By understanding fence height
Building a Fence in Auckland 2025: Rules, Costs & Tips | My Homes Fencing
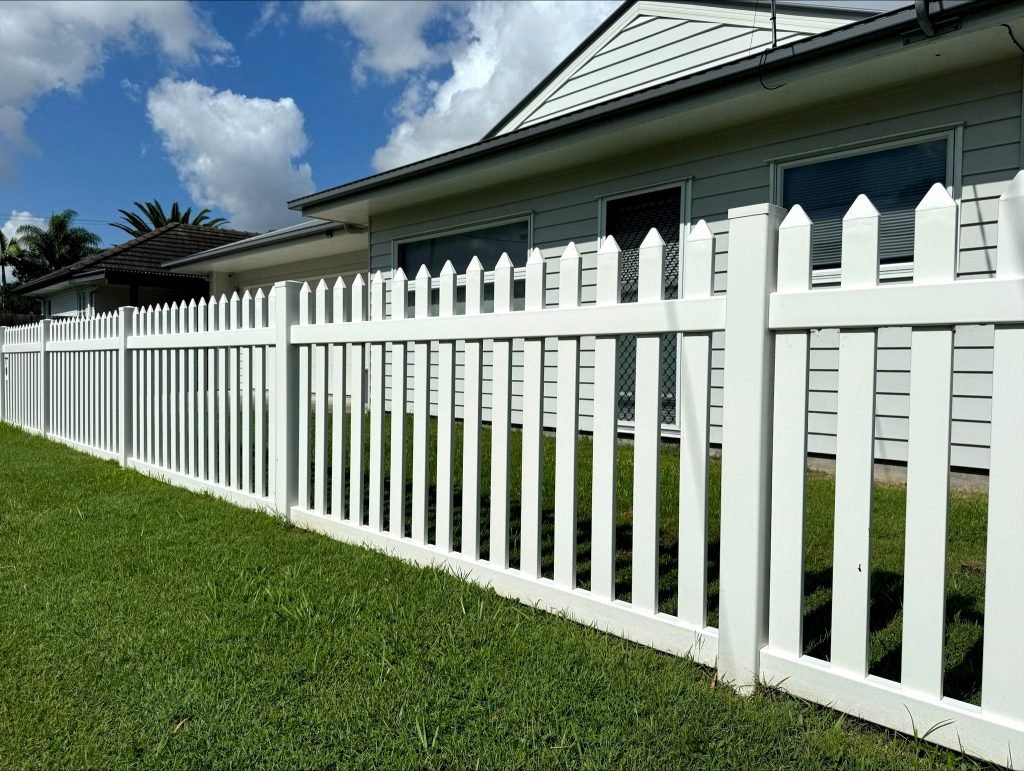
What You Need to Know Before Building a Fence in Auckland Introduction Building a fence in Auckland is more than just a DIY weekend project—it’s a chance to boost your property’s privacy, security, and kerb appeal. At My Homes Fencing Expert, we know that navigating Auckland fence regulations and choosing the right fencing materials Auckland can feel overwhelming. This 2025 guide breaks down everything you need to know to build a fence that complies with boundary fencing laws NZ, suits your style, and withstands Auckland’s coastal climate. Why Fencing Rules Matter in Auckland A well-built fence does more than mark your property line—it enhances your home’s value, ensures privacy, and fosters good neighbourly relations. Getting it right legally and aesthetically is crucial in Auckland’s diverse suburbs. Here’s why building a fence in Auckland demands careful planning: Legal Compliance: Fencing laws Auckland and Auckland Council fence consent rules prevent disputes and fines. Ignoring fence height rules NZ can lead to costly rebuilds. Neighbour Relationships: Clear communication about shared boundary fencing NZ avoids neighbour fencing disputes and ensures cost-sharing agreements are fair. Property Value: A sturdy, stylish fence can boost your home’s value by up to 5–10%, especially in suburbs like Ponsonby or Remuera, where aesthetics matter. Auckland’s Climate: Rain, wind, and salt air demand durable fencing materials Auckland to ensure longevity. Local Example: A Devonport homeowner avoided a dispute by confirming their property line rules NZ with a surveyor before installing a timber fence, ensuring both parties agreed on boundaries. Step-by-Step Guide to Building a Fence in Auckland Follow these six steps to ensure your building a fence in Auckland project is compliant, cost-effective, and built to last. 1. Check Property Boundaries and Talk to Neighbours Before you start, confirm your property line rules NZ to avoid neighbour fencing disputes: Hire a Surveyor: If boundaries are unclear, a licensed surveyor can pinpoint exact lines. Discuss with Neighbours: Under the Fencing Act 1978, shared boundary fencing NZ costs are typically split 50/50. Get written agreement on design and budget. Check Title Deeds: Some properties have existing fencing covenants. Tip: Use Land Information New Zealand (LINZ) for property boundary records. 2. Understand Fencing Regulations and Consent Requirements Auckland Council fence consent may be required depending on your fence’s height, location, or design. Key fence height rules NZ include: Boundary Fences: Up to 2m without consent in most residential zones. Front Fences: Often limited to 1.2–1.5m for safety and visibility. Heritage Zones: Stricter rules apply in areas like Mt Eden or Parnell. Visit Auckland Council’s fencing guidelines for details or consult My Homes Fencing Expert to streamline the fencing consent Auckland Council process. 3. Choose Your Fencing Material (Timber, Metal, PVC, etc.) Select fencing materials Auckland based on durability, aesthetics, and maintenance: Timber Fence Auckland: Treated pine or cedar offers a classic look but needs sealing every 2–3 years. Costs: $100–$200/m. Metal Fencing Solutions: Aluminium or steel is low-maintenance and ideal for coastal areas. Costs: $150–$300/m. PVC/Vinyl: Weather-resistant and modern but less common in NZ. Costs: $120–$250/m. NZ Tip: Choose H3.2-treated timber for timber fence Auckland to resist Auckland’s humidity. 4. Budget and Cost Estimation Based on Size and Style The cost complete a fence NZ depends on materials, length, and labour. 2025 estimates for Auckland: Basic Timber Fence: $150–$250/m (including installation). Metal or Premium Timber: $250–$400/m. Custom Designs: $400+/m for decorative or privacy fencing. Budgeting Tips: Get multiple quotes from fencing contractor Auckland providers. Include costs for consents, surveyor fees, or landscaping. Allocate 10% for unexpected expenses (e.g., rocky terrain). 5. Hire a Qualified Auckland Fencing Contractor A professional fencing contractor Auckland ensures quality and compliance. Look for: Experience: Check portfolios of timber vs metal fencing projects. Licensing: Verify they follow Auckland fence regulations. Reviews: Read testimonials or ask for references. My Homes Fencing Expert specialises in durable, compliant fences tailored to Auckland’s conditions. 6. Plan Construction Around Auckland’s Weather and Terrain Auckland’s wet winters and sloping sections require careful planning: Timing: Build in summer (January–March) for drier conditions. Drainage: Ensure posts are set in concrete with proper drainage to prevent rot. Sloping Land: Use stepped or raked designs for uneven terrain. Pro Tip: Dig post holes at least 600mm deep for stability in Auckland’s clay soils. Use a post-hole digger for efficiency. Pro Tips & Mistakes to Avoid Building a fence in Auckland requires precision to avoid costly errors. Here are tips from My Homes Fencing Expert: Don’t Skip Boundary Checks: Misaligned fences can spark neighbour fencing disputes. Always verify property line rules NZ. Avoid Ignoring Regulations: Exceeding fence height limit NZ (2m for boundary fences) without Auckland Council fence consent risks fines. Mistake: Shallow Posts: Posts less than 600mm deep may wobble in Auckland’s winds. Mistake: Poor Spacing: Incorrect post spacing (over 2.4m) compromises strength. Maintenance Tip: Apply UV-protective sealant to timber fence Auckland annually. For metal fencing solutions, check for rust in coastal areas. Weather Protection: Use galvanised or stainless-steel fixings to prevent corrosion. Insider Advice: Opt for pre-stained timber to save time or choose powder-coated metal fencing solutions for low-maintenance durability. 022 315 8987 info@myhomesconstruct.co.nz Auckland 0618, New Zealand Fance Build And Contact US FAQs Before Conclusion Do I need consent to build a fence in Auckland? Most boundary fences up to 2m don’t require Auckland Council fence consent, but front fences or heritage zone projects may. Check with Auckland Council or your contractor. How high can a fence be in NZ without consent? Fence height limit NZ is typically 2m for boundary fences and 1.2–1.5m for front fences. Higher fences need fencing consent Auckland Council. What’s the best fencing material for Auckland’s climate? Metal fencing solutions like aluminium resist corrosion in coastal areas, while H3.2-treated timber fence Auckland is cost-effective and durable with proper maintenance. Conclusion Building a fence in Auckland is a rewarding project that enhances privacy, security, and property value—when done right. By understanding Auckland fence regulations, choosing durable fencing materials Auckland, and working with a trusted fencing contractor Auckland like My Homes Fencing Expert,
How Many Gates Should a Fence Have? A Guide for Auckland Homes
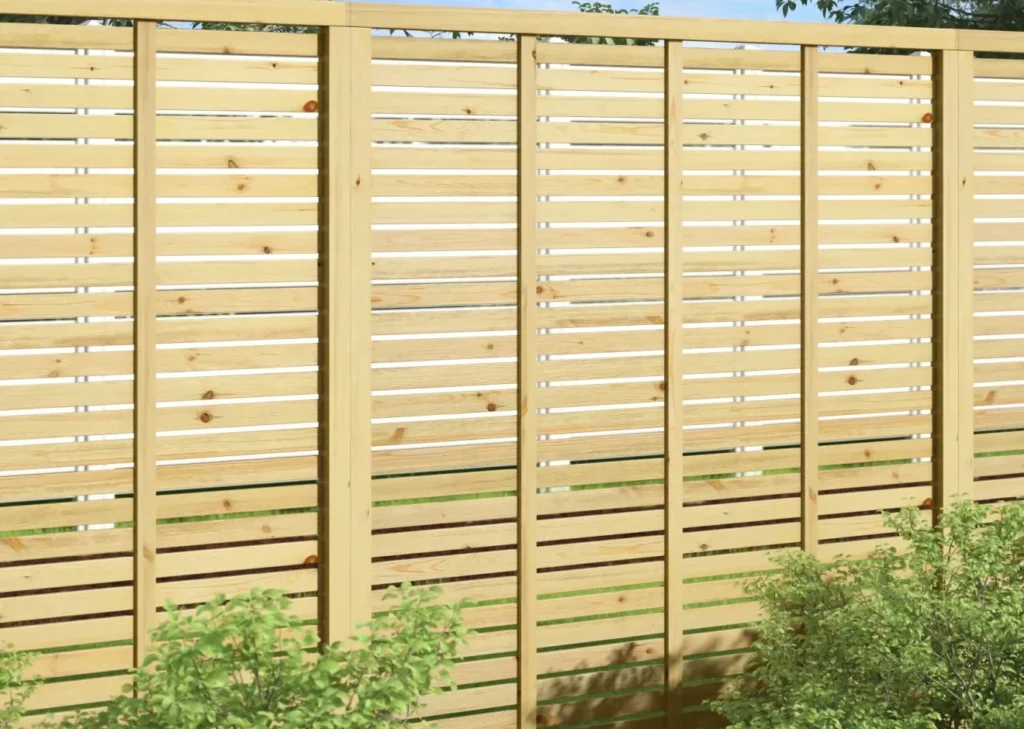
How Many Gates Should a Fence Have? Auckland Homeowner’s Guide Introduction Deciding how many gates your fence should have can transform your Auckland property into a functional and secure space, especially with the region facing 1200 mm annual rainfall, per NIWA, which impacts outdoor planning. Whether you’re a homeowner in Mount Eden upgrading your fence, a DIY renovator in North Shore, or a lifestyle block owner in Papatoetoe, the right gate layout enhances convenience and value. With Auckland properties averaging $1.2 million, per REINZ June 2025 data, smart access can add 1–2% value ($12,000–$24,000). This guide, tailored to Kiwi conditions, helps you plan effectively. For expert design and installation, My Homes Fencing Expert—contactable at 022 315 8987 or info@myhomesconstruct.co.nz—offers smart access and solid security. Let’s explore your options! Why the Number of Gates Matters Gates are more than just entry points—they shape how you use your space. Access convenience: A side gate in Mount Eden saves a 50m walk around the house, per 2024 local feedback. Speeds up North Shore gardening, per 2025 trends. My Homes Fencing Expert optimizes layouts. Emergency exit planning: A back gate in St Heliers meets fire safety rules, per Auckland Unitary Plan 2025, crucial for 60 km/h winds, per NIWA. Essential for Papatoetoe families, per safety standards. My Homes Fencing Expert ensures compliance. Property layout & usability: A garden gate in Remuera accesses a 10m plot, per 2025 design insights. Enhances CBD apartment patios, per local demand. My Homes Fencing Expert tailors to layout. Resale value and futureproofing: Two gates add $5,000–$10,000 value in Titirangi, per QV data, appealing to investors. Prepares North Shore for renovations, per 2025 advice. My Homes Fencing Expert boosts appeal. Why It Counts: Gates enhance life and value—My Homes Fencing Expert plans ahead. General Rule of Thumb Follow these guidelines for practical gate placement. One gate per key area of use: Front yard gate in Mount Eden, backyard gate in North Shore, and side path gate in St Heliers, per 2025 trends. Covers garden access in Papatoetoe, per local feedback. My Homes Fencing Expert maps key areas. At least two gates for most suburban properties: Front and back gates in Remuera ensure dual access, per NZS 3604, for 1200 mm rainfall drainage, per NIWA data. Standard for CBD apartments, per 2025 standards. My Homes Fencing Expert recommends two. Wide gate or double gate for driveway or equipment access: A 3m double gate in Titirangi fits trailers ($200, Bunnings), per 2025 advice. Essential for North Shore mowers, per local insights. My Homes Fencing Expert installs wide options. Rule Tip: Plan for all uses—My Homes Fencing Expert customizes. Factors That Influence Gate Quantity Adjust based on your property’s needs. Property size and layout: A 500 sqm Mount Eden lot needs 3 gates (front, back, garden), per 2025 design tips. A 200 sqm North Shore section suits 2, per local feedback. My Homes Fencing Expert assesses size. Driveway and pedestrian entry points: A driveway gate in St Heliers (3m wide) and pedestrian gate (1m) meet access needs, per Auckland Unitary Plan 2025. Critical for Papatoetoe driveways, per 2025 trends. My Homes Fencing Expert plans entry points. Garden or utility access: A side gate in Remuera accesses a 5m garden, per 2025 insights. Utility gates in CBD apartments serve bins, per local demand. My Homes Fencing Expert adds utility gates. Pet and child containment needs: A self-closing gate in Titirangi keeps dogs safe, per 2025 pet care tips. Childproof locks in North Shore, per safety standards. My Homes Fencing Expert ensures containment. Pool or private areas that need secure entry: A pool gate in Mount Eden (1.2m, $150, Mitre 10) meets Clause F9, per 2025 regulations. Private patios in St Heliers need locks, per local feedback. My Homes Fencing Expert complies with rules. Factor Insight: Match your lifestyle—My Homes Fencing Expert adapts. Types of Gates to Consider Choose gates that fit your needs. Standard pedestrian gates (900mm–1.2m wide): A 1m gate in Mount Eden ($100, Bunnings) suits foot traffic, per 2025 trends. Common in North Shore, per local use. My Homes Fencing Expert builds sturdy options. Driveway gates (manual or automated): A 3m manual gate in St Heliers ($300) or automated ($1,000, Mitre 10) fits cars, per 2025 advice. Ideal for Papatoetoe, per investor feedback. My Homes Fencing Expert installs both. Side yard access gates: A 900 mm gate in Remuera accesses bins, per 2025 design tips. Useful for CBD apartments, per local demand. My Homes Fencing Expert adds side access. Double gates for trailers or mowers: A 3.6m double gate in Titirangi ($400) fits equipment, per 2025 standards. Popular in North Shore, per QV data. My Homes Fencing Expert designs wide gates. Pool gates with compliance locks: A 1.2m pool gate in Mount Eden ($150) meets Clause F9, per Auckland Unitary Plan 2025. Essential for St Heliers safety, per 2025 rules. My Homes Fencing Expert ensures compliance. Type Tip: Pick for purpose—My Homes Fencing Expert offers variety 022 315 8987 info@myhomesconstruct.co.nz Auckland 0618, New Zealand Deck Build And Contact US Pro Tips from My Homes Fencing Expert Enhance your gate plan with these insights. Avoid placing gates where slopes affect swing clearance: Check a 1m slope in Mount Eden, adjusting gate swing, per 2025 design tips. Prevents jams in North Shore, per local feedback. My Homes Fencing Expert adjusts for Titirangi. Use gate hardware rated for NZ weather: Stainless steel hinges ($10/pair, Bunnings) resist 1200 mm rainfall, per NIWA data, ideal for St Heliers. Lasts 10+ years, per 2025 trends. My Homes Fencing Expert uses durable hardware. Consider future access needs (e.g., garden beds, renovations): Plan a side gate in Remuera for future gardens, per 2025 advice. Prepares CBD apartments for changes, per local insights. My Homes Fencing Expert futureproofs. Add privacy latches or self-closing hinges for child safety: Install latches ($5 each) and hinges ($15/pair, Mitre 10) in Papatoetoe, per Clause F9, per 2025 safety standards. Protects North Shore kids, per My Homes Fencing Expert. My Homes Fencing Expert adds safety
How to Build a Privacy Fence: A DIY Guide for Auckland Homes
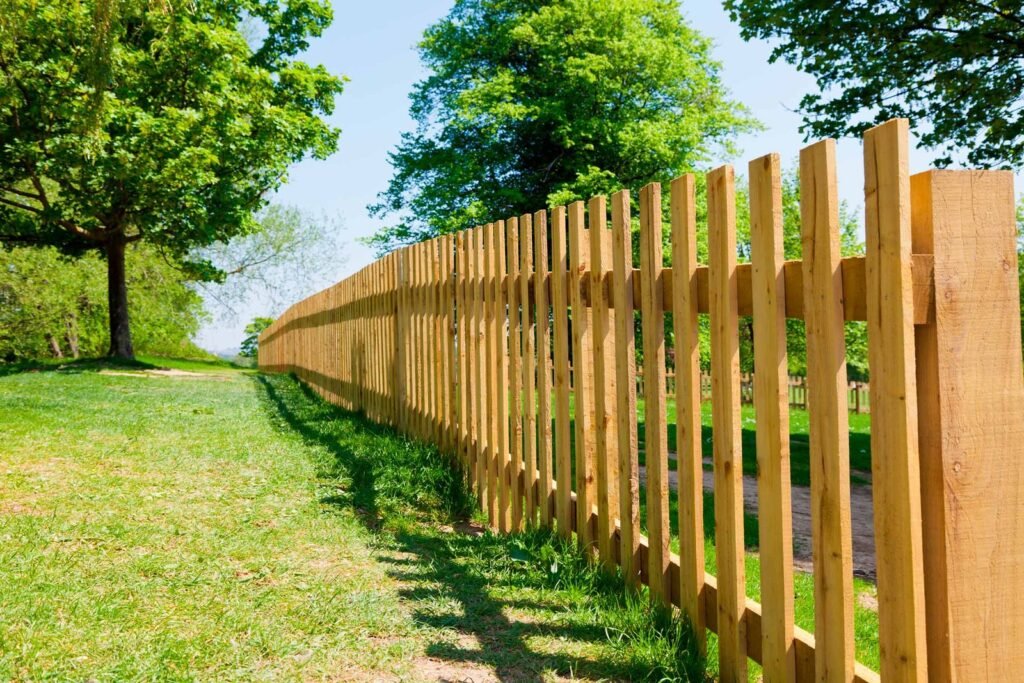
How to Build a Privacy Fence : Step-by-Step for NZ Homeowners Introduction Building a privacy fence is a fantastic way to transform your Auckland backyard into a private oasis, especially with today’s date being 02:03 AM +06 on Tuesday, June 24, 2025, and the region’s 1200 mm annual rainfall, per NIWA, demanding durable designs. Whether you’re a homeowner in Mount Eden seeking seclusion, a DIYer in North Shore, or a property investor in Papatoetoe boosting value, this guide offers practical steps tailored to Kiwi conditions. With Auckland properties averaging $1.2 million, per REINZ June 2025 data, a well-built fence can add 1–2% value ($12,000–$24,000). For expert results or complex projects, My Homes Fencing Expert—contactable at 022 315 8987 or info@myhomesconstruct.co.nz—delivers secure, stylish fences built to last. Let’s get started! Why Build a Privacy Fence? A privacy fence offers more than just a barrier. Block out neighbours or street views: Shields Mount Eden gardens from nosy passersby, per 2024 Houzz NZ trends. Creates a retreat in North Shore’s busy suburbs, per local feedback. My Homes Fencing Expert customizes for Titirangi. Create a secure outdoor area: Keeps kids and pets safe in St Heliers, per 2025 safety standards. Deters intruders in Papatoetoe, adding 5% security value, per QV data. My Homes Fencing Expert ensures robust builds. Add value and visual appeal to your property: A $5,000 fence in Remuera boosts resale by $10,000–$20,000, per REINZ June stats. Enhances CBD apartment patios, per 2025 design insights. My Homes Fencing Expert enhances aesthetics. Why It’s Worth It: Privacy pays off—My Homes Fencing Expert maximizes benefits. Check Council Rules Before You Begin Avoid headaches by following Auckland regulations. Auckland height limits (usually up to 2m without consent): Fences up to 2m in Mount Eden need no consent, per Auckland Unitary Plan 2025, if within boundaries. Over 2m in North Shore requires a 20-day application, per local rules. My Homes Fencing Expert handles permits. Boundary fence rules: Must align with neighbour’s fence in St Heliers, per Clause B1 (Structure), avoiding disputes. Check easements in Papatoetoe, per 2025 guidelines. My Homes Fencing Expert ensures compliance. Notify neighbours if required: A courtesy note in Remuera builds goodwill, per neighbourhood etiquette, per 2025 trends. Mandatory for shared boundaries in CBD apartments, per local feedback. My Homes Fencing Expert coordinates with neighbours. Rule Tip: Check first—My Homes Fencing Expert guides you. Tools & Materials You’ll Need A well-stocked toolbox is your foundation. Here’s what you’ll need, with details on why each matters: Measuring Tape (25 ft): Ensures accurate post and rail lengths—precision prevents wobbly rails. Level (2 ft or 4 ft): Checks plumb and level alignment for posts and rails. Circular Saw or Miter Saw: Cuts wood or composite cleanly. A miter saw excels at angled cuts for a pro finish. Drill & Bits: Drives screws and bolts. Use a ⅛-inch bit for pre-drilling wood, ⅜-inch for bolts. Screws & Bolts: Stainless steel or galvanized (2½-inch deck screws, ⅜-inch lag bolts) resist rust in outdoor conditions. Post Anchors & Handrail Brackets: Anchor posts to the deck frame and rails to posts securely. Safety Goggles & Gloves: Protect against sawdust, splinters, and sharp edges. Sandpaper (120-grit) or Sander: Smooths cuts for safety and a polished look. Optional: Carpenter’s square (for perfect angles), chalk line (for long runs), and wood stain/paint (for finishing). Invest in quality—cheap tools lead to sloppy cuts and frustration. For contractors, brands like Makita or Bosch are reliable; DIYers can grab basics from Mitre 10 or Bunnings. Step-by-Step Guide to Build a Privacy Fence Follow these steps for a secure, private fence. 1️⃣ Plan Your Layout and Mark the Fence Line Use stakes and string to outline a 10m line in Mount Eden, spacing posts 2m apart, per NZS 3604. Check alignment in North Shore with a tape measure ($10, Mitre 10), per 2025 tips. My Homes Fencing Expert surveys Papatoetoe layouts. 2️⃣ Dig and Set Your Fence Posts Dig 600–800 mm holes in St Heliers, widening at the bottom (300 mm) for stability, per Clause B1. Set 100 x 100 mm H4 posts with concrete (20 kg per hole), leveling with a spirit level, per NIWA curing time. My Homes Fencing Expert ensures Titirangi depth. 3️⃣ Attach Rails (Top, Middle, Bottom) Fix 150 x 50 mm H3.2 rails to posts in Remuera with 90 mm nails, spacing 400 mm apart, per NZS 3604. Use a spacer ($5, Bunnings) in North Shore for consistency, per 2025 advice. My Homes Fencing Expert aligns for CBD apartments. 4️⃣ Install Fence Palings or Panels Overlap 90 x 19 mm palings slightly in Mount Eden for full privacy, securing with 65 mm screws, per DIY guidelines. Use pre-made panels ($50/sqm) in St Heliers, per 2025 trends, adding a spacer if ventilated. My Homes Fencing Expert ensures tight fits. 5️⃣ Check Levels and Finish with a Cap Rail (Optional) Check level in Papatoetoe with a spirit level, adjusting with shims ($5/pack, Bunnings), per 2025 standards. Add a 150 x 50 mm cap rail ($6/m) in North Shore to prevent water damage, per Clause E2. My Homes Fencing Expert adds stylish caps. Safety Tip: Wear gloves—My Homes Fencing Expert prioritizes safety. 022 315 8987 info@myhomesconstruct.co.nz Auckland 0618, New Zealand Deck Build And Contact US Design Options for Privacy Fencing Tailor your fence to your style. Vertical timber palings: Overlapping boards in Mount Eden block views, per 2024 Houzz NZ trends, costing $500/10m. Popular in North Shore, per local feedback. My Homes Fencing Expert crafts classic designs. Shadowbox or louvre-style designs: Alternating palings in St Heliers allow airflow, adding $100/10m, per 2025 insights. Suits Titirangi breezes, per My Homes Fencing Expert. My Homes Fencing Expert builds ventilated options. Composite or pre-painted options: Low-maintenance composite ($60/sqm) in Remuera lasts 25 years, per 2025 trends. Ideal for CBD apartments, per local demand. My Homes Fencing Expert installs composites. Slatted fences for airflow + style: 20 mm gaps in Papatoetoe enhance ventilation, costing $600/10m, per 2025 advice. Adds modern flair in North Shore, per QV data. My
How Deep to Put Fence Posts: A DIY Guide for Auckland Homes
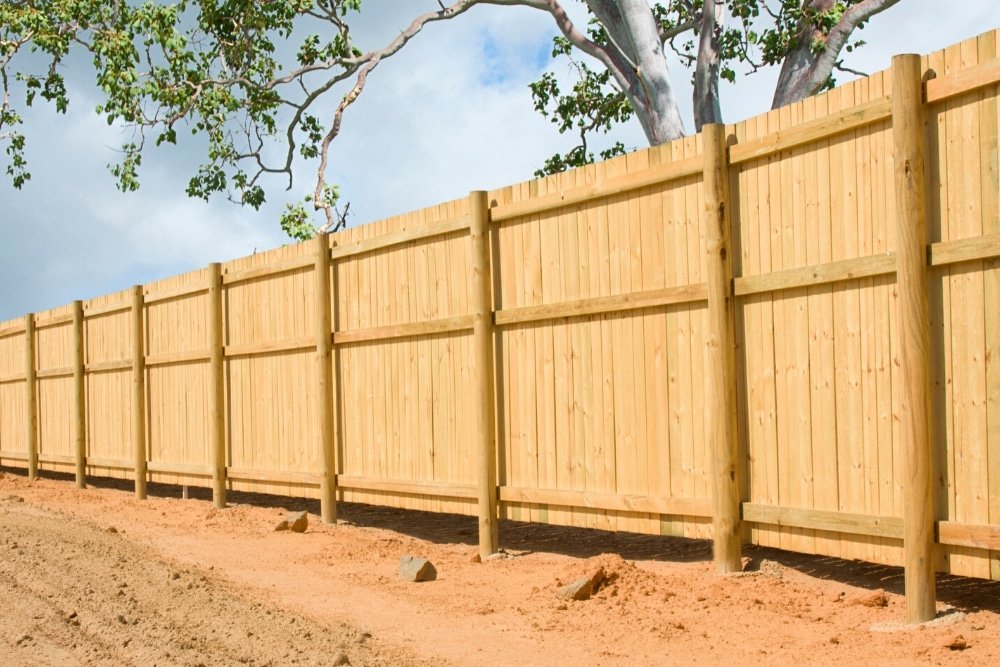
How Deep to Put Fence Posts : The Right Way for Auckland Conditions Introduction Setting fence posts at the right depth is essential for a sturdy, long-lasting boundary, especially in Auckland’s diverse terrain and weather. With today’s date being 09:42 PM +06 on Sunday, June 22, 2025, and the region facing 1200 mm of annual rainfall, per NIWA, proper installation prevents leaning or collapse. Whether you’re a DIY fence builder in Mount Eden, a property owner in North Shore, or a rural landowner in Titirangi, this guide offers practical advice tailored to NZ conditions and building codes. For complex projects or expert results, My Homes Fencing Expert—contactable at 022 315 8987 or info@myhomesconstruct.co.nz—builds fences that last from pickets to paddocks across Auckland. Let’s dig into the details! Why Post Depth is Crucial The depth of your fence posts impacts more than just appearance. Structural integrity and fence longevity: A 600 mm deep post in St Heliers supports a 1.8m fence, resisting 50 km/h winds, per NIWA June 2025 data, per NZS 3604. Prevents rot or shifting in Mount Eden clay soil, extending life by 10–15 years, per 2025 trends. My Homes Fencing Expert ensures robust foundations. Resistance to wind loads and soil movement: Coastal North Shore faces 60 km/h gusts, requiring deeper posts, per local feedback. Wet soil in Papatoetoe expands, pushing shallow posts, per Clause B1 (Structure). My Homes Fencing Expert adjusts for Titirangi stability. Preventing leaning or collapse: Shallow posts (300 mm) in Remuera fail under livestock pressure, costing $200+ to fix, per 2025 Builderscrack data. Ensures safety for CBD apartment boundaries, per WorkSafe NZ. My Homes Fencing Expert prevents collapses. Why It Matters: Proper depth saves money and hassle—My Homes Fencing Expert guarantees it. General Rule for Fence Post Depth Follow these guidelines to meet Auckland’s needs. 1/3 of the total post length in the ground (e.g., for a 1.8m fence, at least 600mm deep): A 1.8m post needs 600 mm buried in Mount Eden, per NZS 3604, balancing height and stability. Applies to North Shore picket fences, per 2025 standards. My Homes Fencing Expert follows this ratio. Minimum 600mm for residential fences: Standard for St Heliers homes under 2m, resisting 1200 mm rainfall, per NIWA June 2025 data. Ensures Papatoetoe security, per local regulations. My Homes Fencing Expert sets this as a baseline. 800mm–1.2m for higher fences, windy zones, or sloped areas: 2.4m fences in Titirangi need 800 mm due to slopes, per Clause B1. Coastal North Shore requires 1.2m for 60 km/h winds, per 2025 trends. My Homes Fencing Expert deepens for Remuera challenges. Rule Tip: Measure twice—My Homes Fencing Expert verifies depths. Factors That Affect Post Depth Adjust depth based on these local conditions. Soil type (clay vs sand vs rock): Clay in Mount Eden holds posts at 600 mm but needs drainage, per Clause E2 (External Moisture). Sandy North Shore requires 800 mm for stability, per 2025 DIY advice. My Homes Fencing Expert tests Papatoetoe soil. Fence height and design: A 1.2m wire fence in St Heliers needs 400 mm, while a 2.4m solid fence in Titirangi needs 800 mm, per NZS 3604. Complex designs in Remuera add 200 mm, per local feedback. My Homes Fencing Expert customizes depths. Exposure to wind (coastal or open sites): Coastal CBD apartments face 70 km/h gusts, needing 1m depths, per NIWA data. Open Papatoetoe paddocks require 800 mm, per 2025 trends. My Homes Fencing Expert adjusts for North Shore. Whether posts are timber, metal, or concrete: Timber (H4, $15/m) needs 600–800 mm in Mount Eden, per Clause E2. Metal ($20/m) or concrete ($30/m) in St Heliers can go 500 mm, per 2025 rates. My Homes Fencing Expert selects materials. Factor Insight: Soil drives depth—My Homes Fencing Expert assesses onsite. Tools & Materials Needed Equip yourself for a solid fence post installation. Post hole digger or auger: Post hole digger ($50, Bunnings) or auger ($50/day) digs 600–1200 mm holes in Mount Eden, per DIY tips. Speeds up North Shore projects, per 2025 advice. My Homes Fencing Expert uses augers for Titirangi. Tape measure: A 5m tape measure ($10, Mitre 10) marks 600 mm depths in St Heliers, per NZS 3604. Essential for Papatoetoe accuracy, per local standards. My Homes Fencing Expert ensures precision. Level: A 600 mm spirit level ($15, Mitre 10) checks plumb in Remuera, key for stability, per Clause B1. Critical for CBD apartment fences, per 2025 trends. My Homes Fencing Expert verifies alignment. Concrete mix or post mix: Concrete mix (20 kg, $10) or post mix ($12, Bunnings) sets posts in North Shore, curing 24–48 hours in 70% humidity, per NIWA June 2025 data. Stabilizes Mount Eden, per local experience. My Homes Fencing Expert mixes for durability. Gravel for drainage: Gravel (10 kg, $10) aids drainage in Titirangi clay, per Clause E2, preventing rot. Adds 50 mm base in St Heliers, per 2025 tips. My Homes Fencing Expert includes gravel. Tool Tip: Rent an auger—My Homes Fencing Expert suggests local hires. Step-by-Step Guide to Setting Fence Posts to the Right Depth Follow these steps for a secure fence in Auckland. 1️⃣ Mark Your Fence Line Use string and stakes to outline a 20m line in Mount Eden, spacing posts 2m apart, per NZS 3604. Adjust for North Shore slopes, marking with spray paint ($5, Bunnings), per DIY guidelines. My Homes Fencing Expert surveys Papatoetoe lines. 2️⃣ Dig Post Holes to Required Depth Dig 600 mm holes for a 1.8m fence in St Heliers, widening at the bottom (300 mm) for stability, per Clause B1. Use 800 mm for Titirangi’s 2.4m fences, per 2025 trends. My Homes Fencing Expert digs for Remuera precision. 3️⃣ Add Gravel for Drainage Pour 50 mm gravel in North Shore holes to prevent water pooling, per Clause E2, using 10 kg ($10, Bunnings). Levels base in Mount Eden, per 2025 advice. My Homes Fencing Expert ensures drainage. 4️⃣ Position and Level the Post Place 100 x 100 mm H4 posts ($15/m) in Papatoetoe, checking level with a spirit level,
How Deep Do Fence Posts Need to Be? NZ Guide for Auckland Fences
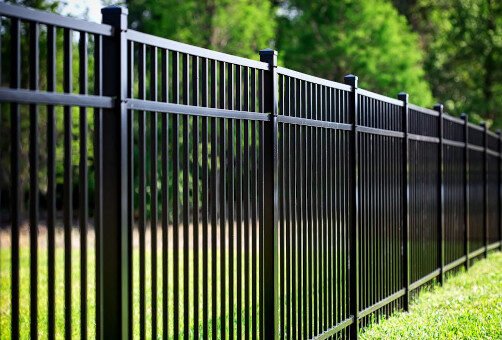
How Deep Do How Deep Do Fence Posts Need to Be? Introduction Building a sturdy, long-lasting fence starts with getting the foundation right—specifically, the depth of your fence posts. For Auckland homeowners, DIYers, landlords, and lifestyle block owners, understanding how deep fence posts need to be is key to ensuring your fence stands strong against the city’s windy coastal weather and diverse soil conditions. Whether you’re putting up a boundary fence or enhancing your backyard’s privacy, this guide will walk you through NZ fencing standards, practical steps, and pro tips from My Homes Fencing Expert, Auckland’s trusted fencing pros. Why Fence Post Depth Matters The depth of your fence posts directly impacts the stability, durability, and safety of your fence. In Auckland, where coastal winds and clay-heavy soils are common, getting the depth right is non-negotiable. Here’s why: Structural Stability: Posts set too shallow can lean or collapse under the weight of the fence or external pressures like wind. Weather and Wind Resistance: Auckland’s high wind zones, especially in coastal areas like the North Shore or Manukau, demand deeper posts to anchor against gusts. Compliance with Local Building Codes: NZ’s Building Code and Auckland Council regulations often specify minimum depths for fence posts to ensure safety and compliance. A poorly set fence can lead to costly repairs or even disputes with neighbours over boundary lines. By following proper guidelines, you’ll avoid these headaches and enjoy a fence that lasts decades. Standard Fence Post Depth Guidelines in NZ In New Zealand, a general rule of thumb for fence post depth is to bury one-third of the total post height underground. This ensures a solid foundation while balancing cost and effort. For example: For a standard 1.8m high fence (common for residential boundaries), the post should be buried approximately 600mm deep. For a 1.2m fence, aim for a 400mm depth. For taller fences, like 2.4m privacy fences, you’ll need posts buried at least 800mm deep. Timber vs Steel Posts The material of your posts also affects depth: Timber Posts: Common in Auckland for their affordability and natural look, timber posts (like H4-treated pine) need to be set deeper in soft or clay soils to prevent rot and movement. Steel Posts: Often used for modern or industrial-style fences, steel posts can sometimes be set slightly shallower due to their strength, but they still require a solid concrete base. Check out the post hole depth chart below for quick reference: Fence Height Recommended Post Depth Total Post Length (Timber) 1.2m 400mm 1.8m 1.8m 600mm 2.4m 2.4m 800mm 3.2m Note: Always check with Auckland Council for specific timber fencing regulations in NZ if your fence exceeds 2.5m in height, as consents may be required. Factors That Influence Post Depth Several factors unique to your Auckland property will determine the exact depth needed for your fence posts. Here’s what to consider: Soil Type: Auckland’s soils vary widely. Clay-heavy soils (common in West Auckland) retain moisture, requiring deeper holes and better drainage. Sandy soils (like those near East Coast beaches) may need wider holes to stabilize posts. Rocky soils, found in parts of the Waitakere Ranges, can make digging trickier but may require less depth due to natural anchoring. Fence Height and Weight: Taller or heavier fences (e.g., solid timber panels) need deeper posts to support the extra load. Wind Zones: Auckland’s NZ wind zones range from medium (inland areas like Henderson) to high (coastal suburbs like Takapuna). High wind zones demand deeper posts and stronger anchoring, often with more concrete. Sloped or Flat Terrain: On sloped sections, posts may need to be deeper on the downhill side to maintain stability. Stepped fencing designs are common in Auckland’s hilly suburbs like Ponsonby or Mt Eden. By assessing these factors, you can tailor your post depth to your site’s unique conditions, ensuring a fence that’s both functional and compliant. Tools & Materials You’ll Need Before you start digging, gather these essentials for DIY fence installation in Auckland: Post Hole Digger or Auger: Manual diggers work for small projects; augers speed things up for larger fences. Gravel or Drainage Aggregate: Essential for preventing water pooling around posts, especially in clay soils. Concrete Mix: Use a high-strength mix for securing posts. Pre-mixed bags are convenient for DIYers. Spirit Level and Measuring Tape: For precise alignment and depth. Timber or Steel Posts: Opt for H4-treated timber posts for ground contact to resist rot, or galvanized steel for durability. Shovel, Braces, and Stakes: For digging, stabilizing posts, and ensuring straight lines. Pro tip: Renting an auger from a local hire centre can save hours of manual digging, especially in Auckland’s tough clay soils. 022 315 8987 info@myhomesconstruct.co.nz Auckland 0618, New Zealand Contact US How to Set Fence Posts Correctly Follow these steps to ensure your fence posts are set securely for a long-lasting fence: Mark and Dig Precise Post Holes Measure and mark post locations (typically 1.8–2.4m apart, depending on fence design). Dig holes to the recommended depth (e.g., 600mm for a 1.8m fence). Ensure the hole is wide enough—about 300mm in diameter for timber posts. Add Gravel for Drainage Pour 100–150mm of gravel or drainage aggregate into the base of each hole. This prevents water buildup, which can rot timber or corrode steel. Position the Post and Level It Place the post in the hole and use a spirit level to ensure it’s plumb (perfectly vertical). Use temporary braces or stakes to hold the post in place. Pour Concrete and Brace the Post Mix and pour concrete into the hole, filling it to just below ground level. Slope the concrete slightly away from the post to shed water. Double-check the post’s alignment before the concrete sets. Allow Curing Time Before Attaching Rails Let the concrete cure for at least 24–48 hours (check the mix instructions). Once cured, remove braces and proceed with attaching rails or panels. For a visual guide, check out My Homes Fencing Expert’s website for tutorials or contact their team for professional advice at 022 315 8987.
How to Layout a Curved Fence: A DIY Guide for Auckland Homes
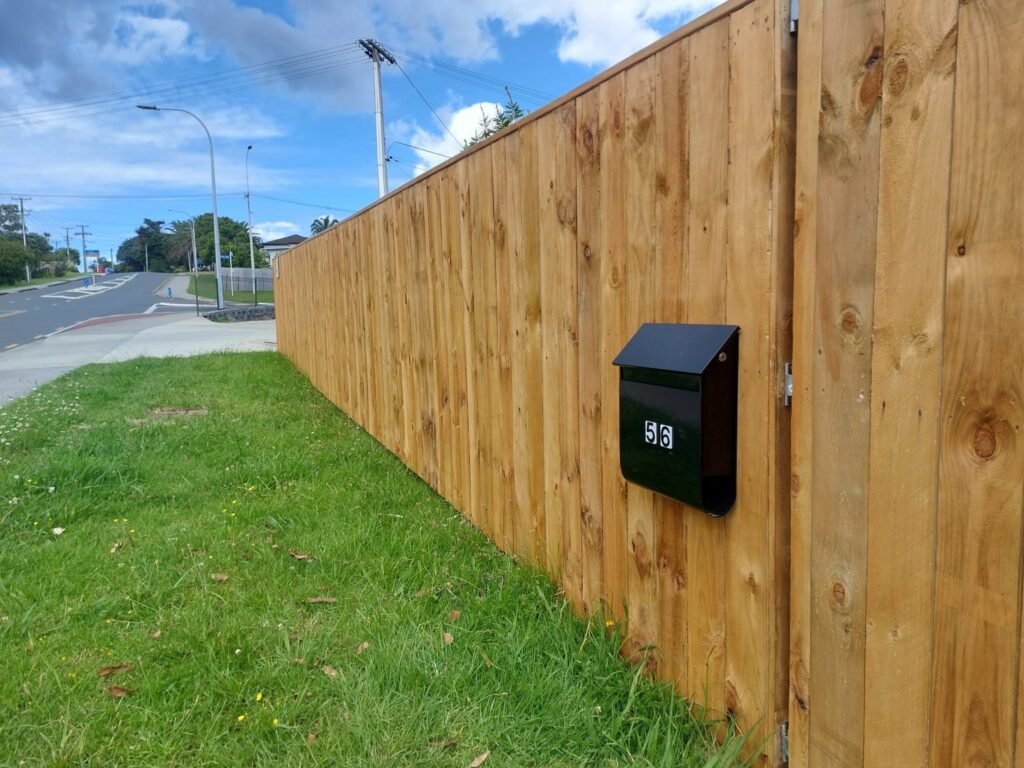
Learn how to layout a curved fence with this DIY guide for Auckland homeowners. Discover tools, steps, and why My Homes Fencing Expert is your trusted pro
How to Build a Fence: A DIY Guide for Auckland Homeowners

Learn how to build a fence with this DIY guide for Auckland homeowners. Explore tools, steps, and why My Homes Fencing Expert is your top choice for professional fencing.
